Monday, December 13, 2010

Mexican Pizzas/ Fiesta Nachos

Here is a really yummy homemade Mexican dish! Growing up, my mom would call them Fiesta Nachos, but I never knew what she was referring to, so I called them Mexican Pizzas. Easier to identify that way I think :)  What's nice about these is you can add just about anything you want to them. Olives, tomatoes, hot chili peppers, anything you want! You are also limitless with what you want to top it with at the end: Lettuce, more tomatoes, salsa, sour cream , ranch even (this is actually pretty darn good). So have fun and be creative with it!

You will need:
7 medium-size wheat tortillas (depending on size, you may need more or less)
1 can of refried beans
1 small can of chopped green chilis
sliced olives (I didn't have any this time)
Shredded cheddar and mozzarella cheese

Begin by heating a pan on medium heat. Add about a Tbsp of oil. When oil is heated, add tortilla. Cook until golden brown and crisp, then flip over and crisp the other side. Add more oil when needed to prevent tortillas from burning. 

Meanwhile, in a small saucepan, add beans and 1/4 cup water (the water helps the beans to be less... stiff. This will make it easier to spread onto the tortillas). Heat beans on medium heat, stirring frequently.

When each tortilla is golden brown and crispy, lay it on a plate of paper towels to let any excess oil drain off. 

Then place all the tortillas into a thin baking sheet. You may need two baking sheets, depending on how large your tortillas are.

Begin layering your ingredients. Start with the beans...

Then the green chilis...

Then the cheese... (if I had olives, I would put them on last...)

Bake in the oven at 350 degrees for about 14 minutes, or until all the cheese is melted.

Serve with your favorite toppings and enjoy! You may need a fork and knife for this... :)

Monday, November 29, 2010

Apple Pie


This pie recipe is kind of a big deal. At every family function where pies are found, my mom always has the apple pie assignment.  Seriously though, I have honestly never tasted an apple pie better than this one. This recipe sets the bar!

You will need:
Filling:
8-10 Granny Smith apples (the green sour ones)
3/4 C of a combination of brown and white sugar (or sucanat)
1/2 tsp. cinnammon (be generous, here)
1/4 tsp. nutmeg
2 Tbsp. Tapioca
Crust:
1 1/2 C flour
1/2 tsp. salt
1/2 C shortening
5 Tbsp. cold water
egg white of one egg
white sugar for sprinkling

Begin by peeling and slicing your apples, placing them in a large bowl.

Add all of the remaining filling ingredients and stir. Set aside to let the sugar activate the juices within the apple, stir occasionally.

Meanwhile, work on the crust. Add flour and salt to a medium size bowl and stir.

Add shortening and mix together, pressing with a fork until the mixture looks crumbly.  This may seem difficult at first, but keep working on it, it gets easier!

Add water and mix together until you get a dough. With your hands, form dough into a large ball.  With a knife, cut your dough in half (one half is for the bottom of the pie, the other is for the top). Take the first half and place it on a counter or table dusted with flour.

Use a rolling pin to flatten out your dough (trying to keep it in some kind of circle shape as much as possible). You may need to keep dusting flour on the rolling pin, dough, and counter to keep the dough from sticking to anything. 

When you think it's flat enough, check to see if it fits by placing your pie tin over it. If the dough is bigger than the tin, it is ready.

Fold the dough in half to make the transfer to the pie tin easier. Then unfold it once it is in the pie tin.

Brush the dough with egg white.

Add your filling. At this point, your apples should be a bit juicy. You may have apples left over. Just eat them!

Add a bit of butter or margarine, then set aside to work on the top crust.

Use your other dough half to make the top part of your crust. 

Lay it on top of the apple filling...

Trim off any excess, but leaving enough room to make a crust design.

Here's the traditional crust design in our family. 

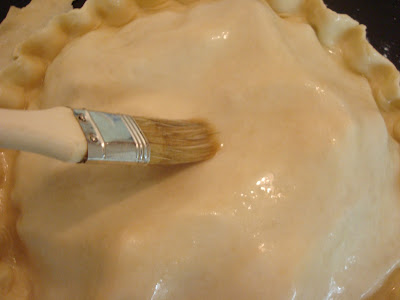
Brush the top with egg whites, then sprinkle with sugar. 

Cut some slits in the top. 

Gently cover the crust edges with tin foil to prevent then from browning too much. 

Here's the baking instructions: Bake at 450 for the first 15 minutes, then turn down the temp to 350 (leaving the pie in the oven) baking for another 25-30 minutes. In the last 5-10 minutes of baking, remove the tin foil. Let cool before eating. Enjoy with some nice vanilla ice cream!

Wednesday, November 24, 2010

Parmesan Chicken


This has always been one of my absolute favorite chicken recipes that's been passed down in the family.  It also falls under my "healthy, easy, tasty" requirements for a meal.  So here's what you need:

2 lbs. Chicken pieces of your choice (I like to use dark meat in this recipe). Remove the skin if any.
8-16 oz. of low fat plain yogurt
3 Tbsp. parmesan cheese, powdered
1 tsp. garlic salt

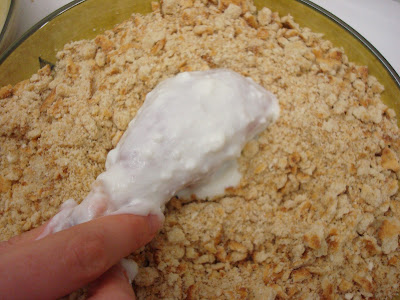
Empty contents of Ritz cracker packages into a large ziplock bag. Seal the bag, releasing most of the air. With a rolling pin, crush the crackers until they are in small crumb pieces. 

Pour crackers into a bowl large enough for dipping chicken.  Add parmesan cheese and garlic salt.  Mix together. 

Place yogurt into a separate bowl, and prepare everything into an assembly line: Chicken, yogurt, crumbs, pan.

Individually dip each chicken into the yogurt until completely covered. 

Next, dip the chicken into crumb mixture, then place in the pan. 

Once all the chicken is in the pan, sprinkle on any extra crumbs. Optional step: drizzle 1/4 cup, of melted butter or margarine over the top of the chicken.  Bake at 375 degrees for 45 minutes to 1 hour. Enjoy!

Monday, November 15, 2010

Sucanat Chocolate Brownies


These brownies got nothin on the box kind.  AND they call for sucanat, not processed white sugar! I found this recipe on the back of this sucanat bag.  Yep, it rocks.  If this doesn't sell you on sucanat, I don't know what will. 

Here's what you need: 
1 1/2 stick butter or margarine
1 bag 12 oz. semi-sweet chocolate chips (or 2 cups)
2 cups sucanat
1 Tbsp. vanilla
5 large eggs, beaten
1 1/4 cups unbleached flour
1/2 tsp. salt

Start by greasing a metal 9x13 pan and preheat oven to 350. In a medium sauce pan, melt margarine and chocolate chips over medium heat, stirring constantly with a wooden spoon. 

Once melted, add sucanat and vanilla.

Stir until well combined. It should have kind of a grainy texture like this.

In a small bowl, beat all eggs, then add to chocolate mixture and briskly stir together to mix well. 

Once eggs are mixed in, add flour and salt. 

Once well combined, pour brownie mixture into the metal pan.  Bake in the oven for 30 minutes. Check with a toothpick for doneness. 

Weekly Spotlight: Sucanat


This has got to be one of my favorite healthy alternatives... so yummy!  Now I can bake with a little less guilt.

Sucanat is, basically, dehydrated sugar cane juice, which leaves all of its molasses content in tact. Regular white sugar, is processed and refined and contains little nutritional value. Sucanat, however, ranks the highest of all the sugars that are derived from cane juice. It also has a lower count of sucrose than regular white sugar.

Here are some of its nutritional highlights:
Low in sucrose
High in potassium
High in magnesium
High in vitamin A
Also contains: Chromium, phosphorus, Vitamin B, and calcium

This is a natural, pure, whole food sugar substitute. Its taste is most similar to brown sugar, and is slightly sweeter than refined white sugar. That being said, you can use a 1:1 ratio in your recipes when substituting sugar for sucanat.  I have completely converted over to sucanat, and use it in homemade brownies, cookies, etc.

You can order it online here, or you can find it in a lot of grocery stores in the whole foods and baking sections. (I have yet to see it in Walmart).  I get my sucanat from Sunflower Market. Seriously, it's even just fun to eat.  I wouldn't recommend having spoonfuls of it, but definitely wet the tip of your finger and give it a dip every once in a while! :)

Taco Soup and Salad


Here's another way to eat your taco soup.  In a bowl, fill with lettuce about half way.  Pour soup on top to desired amount.  Then sprinkle with cheese and drizzle a little ketchup on top.  Seriously, an awesome warm meal, with a good light salad at the same time.  We love eating it this way.  You can also do this with chili. 

Tuesday, November 9, 2010

Taco Soup

Thanks Mom for the recipe! My family has this soup all the time in the winter and I love it! It is also very very easy! I cooked mine in a crock pot, but you can also simmer it in a pot if you want.

Here's what you need:
1 lb ground chicken or turkey
1 onion, chopped
2 cans corn
2 cans kidney beans
2 cans diced tomatoes
1 can (15 oz) tomato sauce
1 package ( or 3-4 Tbsp) Taco Seasoning

Begin browning meat with the onion on  medium heat in a skillet

Cook until meat is no longer pink and onion is soft

Add corn (with the water from the can!)


Add kidney beans (with the juice water from the can!)

Add tomato cans (with the water from the can!)

Add tomato sauce (there is no extra water in this can!)

Add taco seasoning

Add meat and onion (no need to drain, unless you are using ground beef)

Stir and heat in the crock pot on high for 1-2 hours, or simmer in a pot on a stove for 30 minutes.
Serving options: shredded cheese, Fritos, sour cream, cilantro