Saute in 1 Tbsp. oil in sauce pan over medium heat.
When onion and pepper begin turning soft, add garlic and stir for 1 more minute.
Add flour to pan and stir.
Gradually stir in the broth, combining well with flour.
Add chili powder to soup and stir.
Add chicken and stir again.
Add corn and stir again :)
Leave soup to simmer on low while you prepare the tortilla strips.
Cut tortillas into strips.
Lightly fry in enough oil to cover the bottom of the pan over medium-high heat. Monitor closely and flip strips over when browned
Transfer strips to a paper towel to drain. (I used whole wheat tortillas, so the strips in this picture may be a little darker than yours if you use the corn tortillas)
Serve hot soup in a bowl with tortilla strips, sour cream, and some cilantro if you like!
- detoxifies your body of harmful chemicals and residues that are consumed daily
- helps to lose weight
- reduces the risk of cancer
- minimizes morning sickness, swelling, and other pregnancy blues
- promotes healthy lactation in breastfeeding mothers
- plus TONS of other added benefits
and...
What if it tasted amazing????
Ever try these?
They taste great, don't they?
News flash: The one I'm about to show you how to make is cheaper and better for you.
The basic idea behind the green smoothie is to combine this...
With this...
And maybe a few other ingredients (Wheat grass, carrots, ginger, etc):
********
Now I will answer the question on everyone's mind: "How can something that looks so nasty taste so good?"
In a nutshell: the secret is in the fruit you use. While leafy greens are quite bitter, the natural sugars inside the fruit completely overpower any taste the greens have, so by the time it is all blended together, all you taste is fruit... so why not sneak in some extra nutrients, eh?
So why not just eat a salad?
You don't need to consume the extra additives and fat that is contained in salad dressings. It is also easier on our digestive system if the greens are already finely chopped (blended) for us, due to a low level of hydochloric acid within our stomachs (also, if more plant cell walls are broken, more nutrients can be absorbed). It also forces you to have your daily dose of fruits... more nutrients at once!
Basically, if you had to choose between a salad and a green smoothie, a green smoothie is more efficient, and just makes more sense.
Here is the founder of green smoothies, Victoria Boutenko, to do a little showin' and tellin':
********
So here's how I do it:
Sidenote: I prepare all my food the night before so that all I have to do when I wake up in the morning is throw it in the blender... because I 'aint no morning person.
Rinse your greens if they don't come pre-rinsed. Rinse and chop your desired fruit:
Place all your chopped fruit into a bag. I also add in some shredded carrot (you can't taste this either), and some grated ginger (which lowers cholesterol and has been great to eliminate morning sickness... because I be with child right now).
Tear your greens into similarly-sized pieces and store them in their own bag (all those greens in that bag will last me 2-3 green smoothies, so don't freak out). Then I put them in the fridge and go to bed!
**ZZzzzzzzzzz.....**
Morning: place a handful or two of greens into the blender, with enough water to cover the blades. (This is how you do it if your dad isn't Bill Gates and only have a regular blender and you can't afford a Vitamix, like Victoria has in the video). Then blend until pulpy.
Add your fruit, a handful at a time. Blend, then repeat until all your fruit is blended. (You can see the shredded carrot, grated ginger, and wheat grass that I included with my fruit)
Do a little taste test with your finger. If it's not as sweet as you like, add more fruit, or a little bit of raw honey/ stevia. You can also add yogurt for some probiotics if you would like. This blender is larger than normal, so I made a lot of green smoothie all at once. This will be good for my husband and I for a couple days.
In a hurry in the mornings and don't have time to blend everyday? Green smoothies don't begin to oxidize and break down for 2-3 days, so make them ahead of time in grab 'n go glasses!
**People have asked me if it's okay to use frozen fruits, or juices. Yes, it's okay, but use raw food as your first option. Fresh foods will always have the most nutrients, which is the whole point of the green smoothie. The same goes with canned ingredients. But, if you are in a pinch, sometimes the fresh takes too much time. So if you can't use fresh, use frozen as a second choice, and canned as a last resort, because canned fruit has to be boiled for a short period of time first, killing many of the nutrients you need.
**Tip: While drinking your green smoothie, make sure to take a fish oil capsule, or another source of Omega 3 fatty acids... this is because your body needs the help of this essential fatty acid to absorb all those nutrients into your body... thereby maximizing your green smoothie experience!
**There is so much to cover about green smoothies that I'm sure I left some vital information out. Leave a comment if there are any questions and I'll answer them!
I am in charge of compiling a recipe book for this year's LDS Holistic Conference! The only problem is, I don't have 500 recipes. Will you all help me and submit any recipes that you love? Your names will be printed with each recipe that makes it into the cookbook, and you will also receive a discount for every recipe you submit, up to 7 recipes! Please send this link on to your family and friends! I need the word to spread! The sooner the better! Thanks everyone for your help!
Proceeds from our cookbooksales will help fund future LDS Holistic Living Conferences.
Your name and/or website will be printed with each of your recipes (free advertising!)
The More Recipes You Submit, the More You Save! Receive $1 off for each recipe you contribute that is printed, up to 7 recipes! Limited number of recipes in the cookbook available, so submissions are taken on a first come first serve basis.
This applies towards full price, not the advanced sale price.
Submission deadline is March 20, 2011
Receive FREE advertising as well!
Each recipe you submit will be credited with your name, and if you have a company and/or website you can include that, too!
What are you waiting for.....
Don't Have Recipes, But Still Want a Great Price? Purchase until June 1, 2011 and receive the Discounted price of $13
Regularly $20 after June 1
(free pick up at the Speaker's Bookstore at the 2011 conference on June 25, $3 shipping added if not picked up) ADVANCE PURCHASE HERE Cookbook Sponsorship and Advertising Opportunities Available
Thiscookbook will be edited by the LDS Holisitic Living Founders and Directors,
Becca Price andAmyJones (author of the cookbook, A World of Wisdom), so be rest assured that this cookbook is going to ROCK!
Here is a really yummy homemade Mexican dish! Growing up, my mom would call them Fiesta Nachos, but I never knew what she was referring to, so I called them Mexican Pizzas. Easier to identify that way I think :) What's nice about these is you can add just about anything you want to them. Olives, tomatoes, hot chili peppers, anything you want! You are also limitless with what you want to top it with at the end: Lettuce, more tomatoes, salsa, sour cream , ranch even (this is actually pretty darn good). So have fun and be creative with it!
You will need:
7 medium-size wheat tortillas (depending on size, you may need more or less)
Begin by heating a pan on medium heat. Add about a Tbsp of oil. When oil is heated, add tortilla. Cook until golden brown and crisp, then flip over and crisp the other side. Add more oil when needed to prevent tortillas from burning.
Meanwhile, in a small saucepan, add beans and 1/4 cup water (the water helps the beans to be less... stiff. This will make it easier to spread onto the tortillas). Heat beans on medium heat, stirring frequently.
When each tortilla is golden brown and crispy, lay it on a plate of paper towels to let any excess oil drain off.
Then place all the tortillas into a thin baking sheet. You may need two baking sheets, depending on how large your tortillas are.
Begin layering your ingredients. Start with the beans...
Then the green chilis...
Then the cheese... (if I had olives, I would put them on last...)
Bake in the oven at 350 degrees for about 14 minutes, or until all the cheese is melted.
Serve with your favorite toppings and enjoy! You may need a fork and knife for this... :)
This pie recipe is kind of a big deal. At every family function where pies are found, my mom always has the apple pie assignment. Seriously though, I have honestly never tasted an apple pie better than this one. This recipe sets the bar!
You will need:
Filling:
8-10 Granny Smith apples (the green sour ones)
3/4 C of a combination of brown and white sugar (or sucanat)
Begin by peeling and slicing your apples, placing them in a large bowl.
Add all of the remaining filling ingredients and stir. Set aside to let the sugar activate the juices within the apple, stir occasionally.
Meanwhile, work on the crust. Add flour and salt to a medium size bowl and stir.
Add shortening and mix together, pressing with a fork until the mixture looks crumbly. This may seem difficult at first, but keep working on it, it gets easier!
Add water and mix together until you get a dough. With your hands, form dough into a large ball. With a knife, cut your dough in half (one half is for the bottom of the pie, the other is for the top). Take the first half and place it on a counter or table dusted with flour.
Use a rolling pin to flatten out your dough (trying to keep it in some kind of circle shape as much as possible). You may need to keep dusting flour on the rolling pin, dough, and counter to keep the dough from sticking to anything.
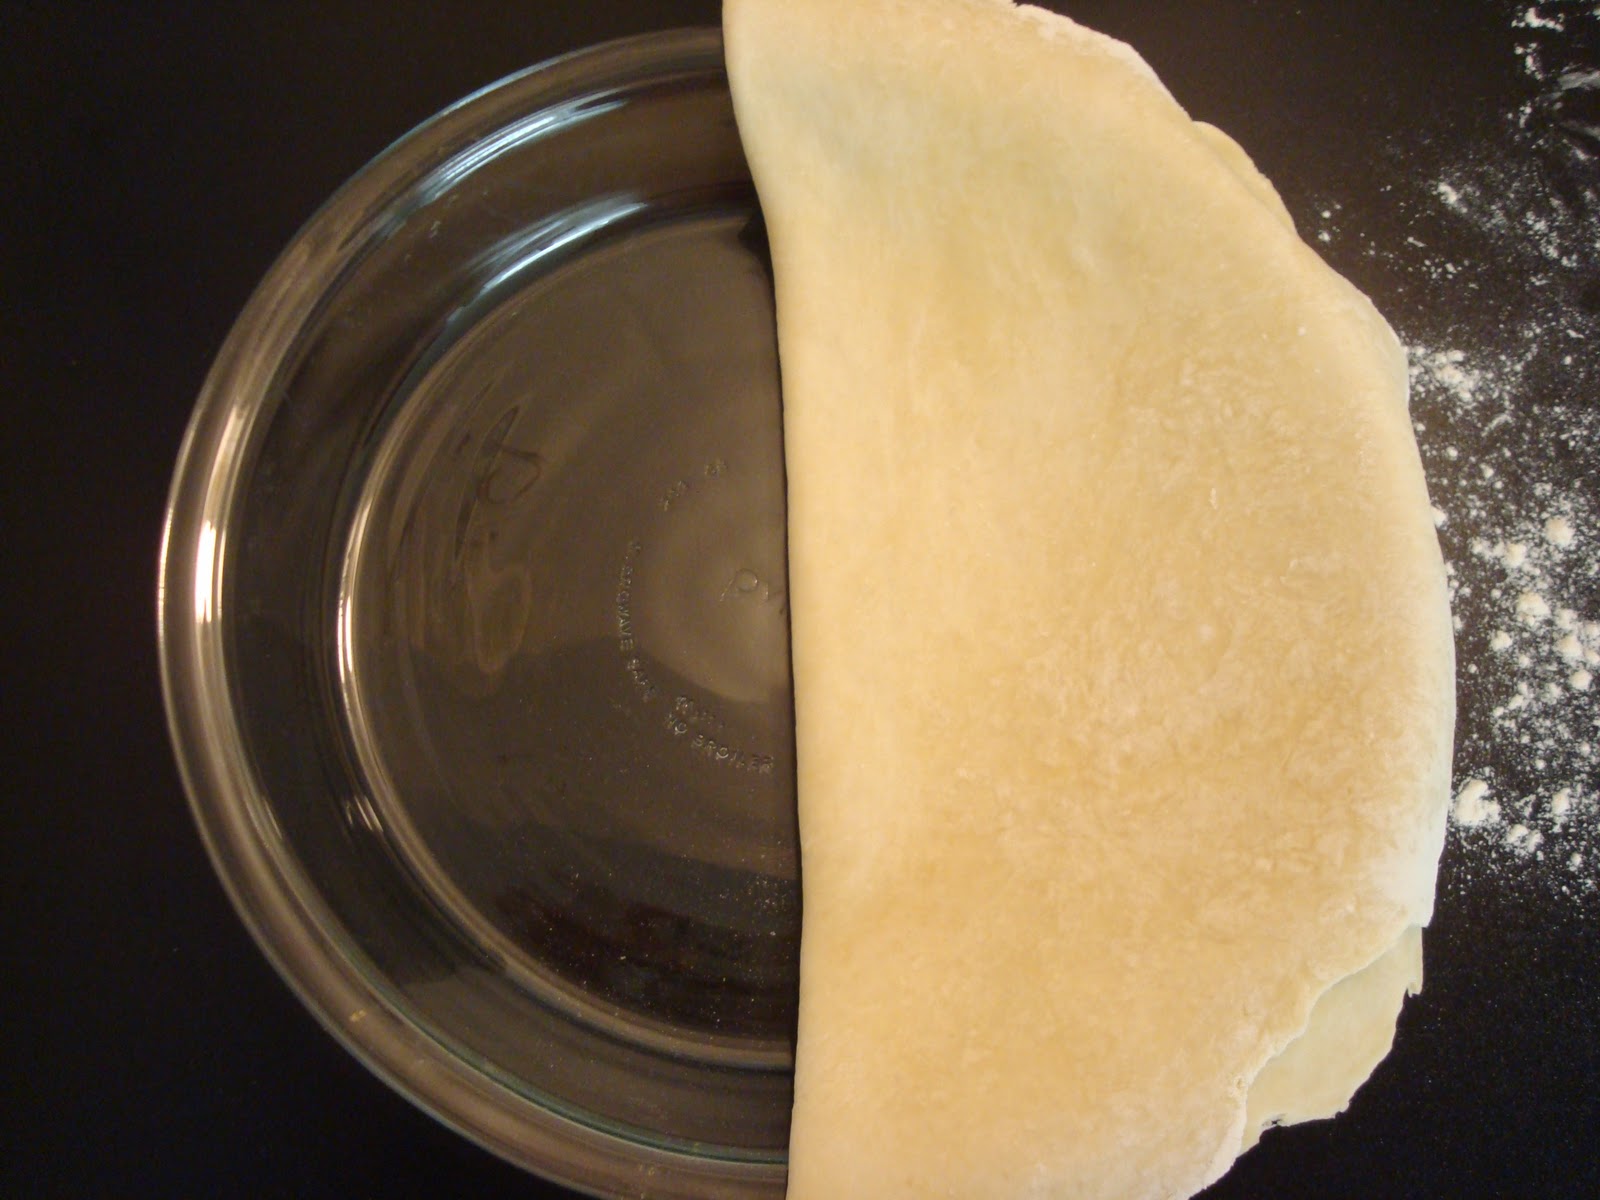
When you think it's flat enough, check to see if it fits by placing your pie tin over it. If the dough is bigger than the tin, it is ready.
Fold the dough in half to make the transfer to the pie tin easier. Then unfold it once it is in the pie tin.
Brush the dough with egg white.
Add your filling. At this point, your apples should be a bit juicy. You may have apples left over. Just eat them!
Add a bit of butter or margarine, then set aside to work on the top crust.
Use your other dough half to make the top part of your crust.
Lay it on top of the apple filling...
Trim off any excess, but leaving enough room to make a crust design.
Here's the traditional crust design in our family.
Brush the top with egg whites, then sprinkle with sugar.
Cut some slits in the top.
Gently cover the crust edges with tin foil to prevent then from browning too much.
Here's the baking instructions: Bake at 450 for the first 15 minutes, then turn down the temp to 350 (leaving the pie in the oven) baking for another 25-30 minutes. In the last 5-10 minutes of baking, remove the tin foil. Let cool before eating. Enjoy with some nice vanilla ice cream!